Standard size or Supersize? What’s the difference?
15th August 2023I’m asked this question quite a lot, and it sometimes surprises me. Isn’t it obvious? Well, probably not as obvious as one might think.
Supersize charts are obviously larger. But what does that mean in terms of how many stitches?
Let’s take the two different versions of a chart we released today – Nene Thomas’ “Mieke”
The standard size is actually quite large by our usual definition – it’s 294 x 448 stitches. It’s full coverage, so to get the number of stitches you will be making, stitch by stitch, to finish the piece, you multiple 294 by 448.. that’s 131,712 stitches. It’s quite a lot. How does that equate into the time it’ll take?
Let’s say you stitch 200 stitches a day – some days you might stitch more, some less – and everyone is different – some have more time, some are faster stitchers, some will stitch tent stitch, and some have far more commitments or simply can’t stitch that much. At 200 stitches a day, every day, that 131,712 sts would take you 659 days (1.8 years) of stitching every day.
The “supersize” version is MUCH bigger. It’s 537 x 800 stitches. Doesn’t look that much bigger does it? But the maths tells otherwise.. 537×800 = 429,600 stitches – that’s over 3 times the number of stitches than there were in the standard size. If you only stitch 200 sts a day, it’d take you 2148 days – nearly 6 years – to finish it. If you want to stitch the supersize version, I would hope you’re able to stitch more than 200 a day 🙂
So visually, what’s the difference?
Let’s talk first about the details in a piece of art, and a touch about how art to cross stitch (full coverage) works.
Every pixel in the art is a stitch. Which means that when we get a piece of art, we have to decide on the balance of “how small do we want to go “- (to make it a project someone can stitch in a reasonable amount of time) – and “how much detail can we afford to lose?”.
When we get a high resolution piece of art from the artists, it’s typically thousands of pixels wide/tall, so we have to edit it. For one, the art conversion programs (none of them) can’t convert anything that big, and two, no one could live that long to stitch it.
When you reduce an image’s size, you reduce a little of the image quality – it gets slightly blurrier. Techniques such as sharpening an image can regain the clarity of the original – almost – with the consequence of adding “digital noise” to it (translation – CONFETTI stitching!). Even supersize designs could be blurry without sharpening. Reducing the size further – while retaining clarity – more sharpening, more confetti.
So.. here’s some closeups of a small area on this design. Original art on the left, “supersize” mockup in the middle, and “standard” mockup on the right.
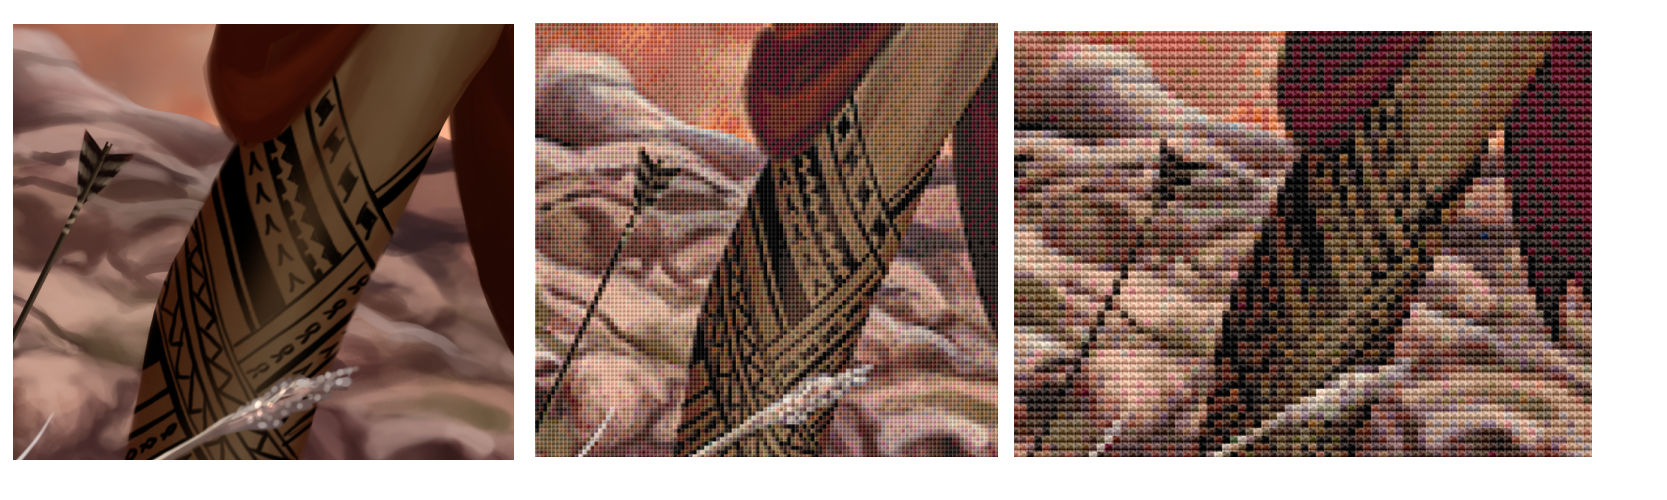
Do bear in mind that when you stitch the piece, your eyes will “blend” the stitches together to make them flow better as well.
So, closeup there are clear differences in clarity. How about taking a step back and looking at the whole thing?
Again – original art on left, supersize mockup in the middle, standard on the right. Both the middle and the right one were separately charted, so there will be differences between them as well as the size.
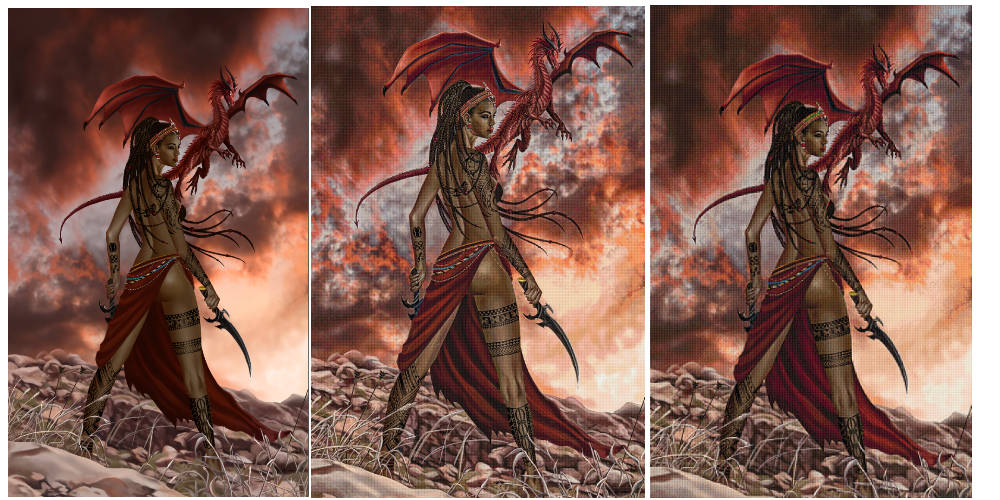
Conclusion – for some pieces of art, where you can bring out extra detail (like the tattoos on her legs in this piece) then supersizing is something we consider – but not for every piece – sometimes the extra size just doesn’t warrant it.
Closeup, you’ll always see a difference with the supersize vs the standard. But you’ll also see differences with the supersize to the original piece of art – the choice really comes down to these few decisions..
- Do the differences make it worth while spending more than 3 times the amount of time on it?
- Do they make it worth 3 times the cost of materials to make it.. not a small consideration nowadays!
- Do you have enough space to display the finished piece?
When in doubt (and this counts for *any* company’s designs…) check the mockup.